To setup your copy of Mac Mail, do the following:
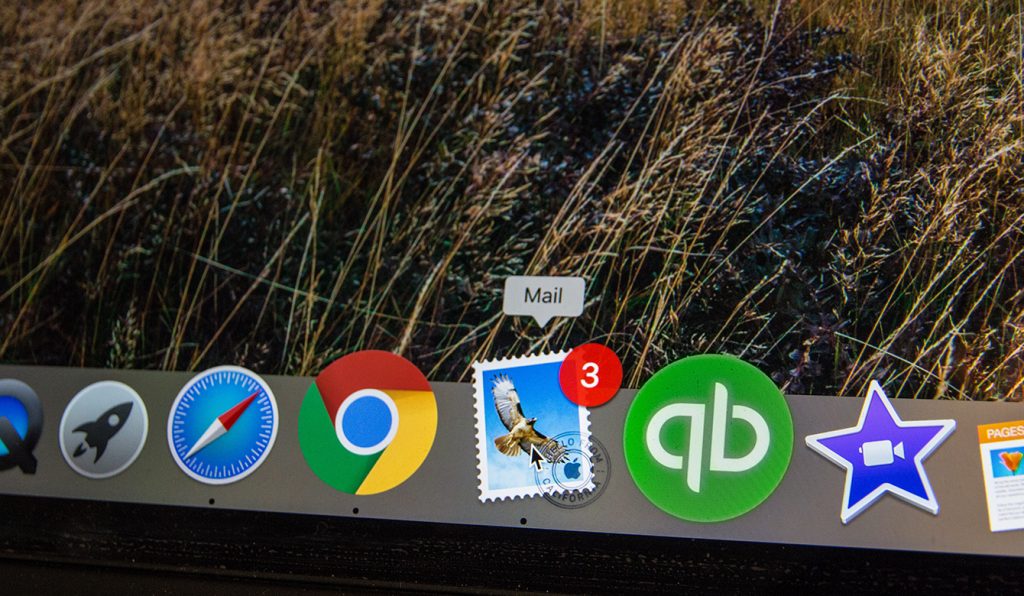
1. Start your copy of Mac Mail from the dock.
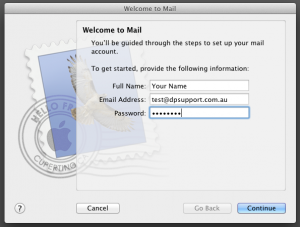
2. The Welcome to Mail screen will appear.
- Enter your name, department or business name in the Full name field. This is what people will see when they receive email from you.
- Enter the full email address and password in the corresponding fields below.
- Click on the Continue button
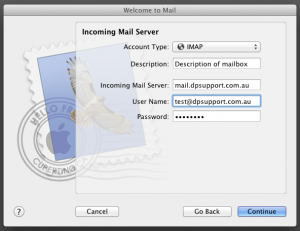
3. The Incoming Mail Server screen will appear.
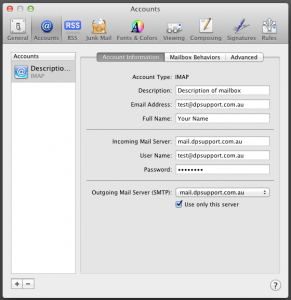
For Account Type select IMAP.
- For description enter a short summary of either the name or purpose of the mailbox.
- For Incoming Mail Server enter the name of your mail server “mail.yourdomainname.com”.
- For User Name enter the full email address.
- For Password enter the current password for your email account.
- Click on the Continue button.
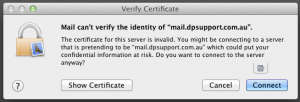
4. A Verify Certificate window will appear.
You can safely ignore this message. Click on the Cancel button.
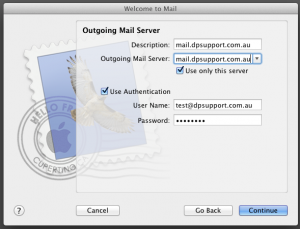
5. The Outgoing Mail Server screen will now appear.
- For the Description enter the name of your mail server “mail.yourdomainname.com”.
- For the Outgoing Mail Server enter the name of your mail server “mail.yourdomainname.com”.
- Check the option “Use only this server”.
- Check the option “Use Authentication”.
- Ensure that your full email address and password are listed below.
- Click on the Continue button.
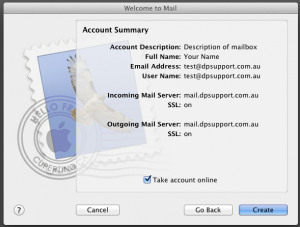
6. You will now see the Account Summary screen.
Click on the Create button.
7. You will now be taken back to your inbox in Mac Mail.
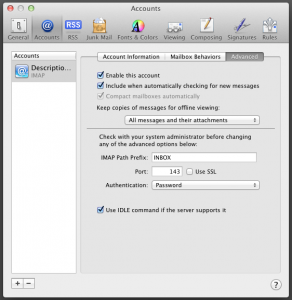
8. Select the Preferences option from the Mail menu.
- Click on the Accounts icon.
- Click on the Advanced tab.
- Turn off the “Use SSL” option. The port number should now change to 143.
9. Click on the Account Information tab.
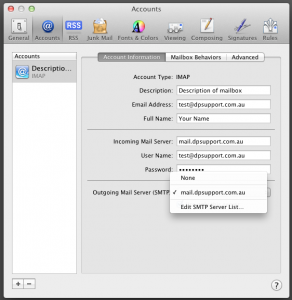
Click on the Outgoing Mail Server drop down menu. Select the name of your mail server “mail.yourdomainname.com”.
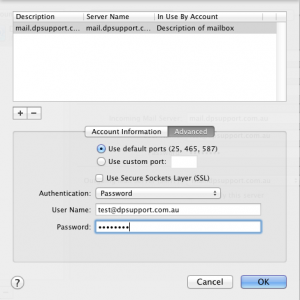
Click on the Advanced tab.
- Leave “Use Default Ports” turned on.
- Turn off the “Use Secure Sockets Layer (SSL)” option.
- Authentication should be set to Password
- For User Name enter the full email address.
- For Password enter the current password for your email account.
- Click on the OK button.
10. Close the Preferences window down by clicking on the red circle in the upper left hand corner. Mac Mail will confirm if you want to save the changes. Click on the Save button.
That’s it! You have now setup email within your copy of Mac Mail.
To find out more about the web hosting and domain name services offered at Digital Pacific visit our website or give us a call on 1300 MY HOST for a friendly chat.

 For Account Type select IMAP.